
Not a typing error.
I could have done circles, but I doubt the effect would have been satisfactory!

Pattern booklet
This is a jelly roll rug. I bought the pattern years ago with the best intentions, but once I’d read the first three pages of it, I was much too lazy a bit intimidated and put it and the jelly roll aside. For years…
Finished size of mine is 48 x 27 inches but may vary. It was easy to make, but the preparation is pretty tedious and took twice as long as the actual assembly. None of it is hard, though. I do think the pattern instructions about the assembly are unnecessarily complicated, as they involve shifting furniture about. You do need an L-shaped return of some sort on your sewing table to hold the growing size of the mat as you stitch, but that’s about it.
You need a jelly roll. You join it end to end with neat diagonal seams until it’s all one strip. You cut batting strips a fraction narrower (the pattern says the same size, but I found that resulted in making it hard to fold the strips), and I cut them at 2¼ inches wide. You can join these strips too, with batting tape, but I didn’t bother.
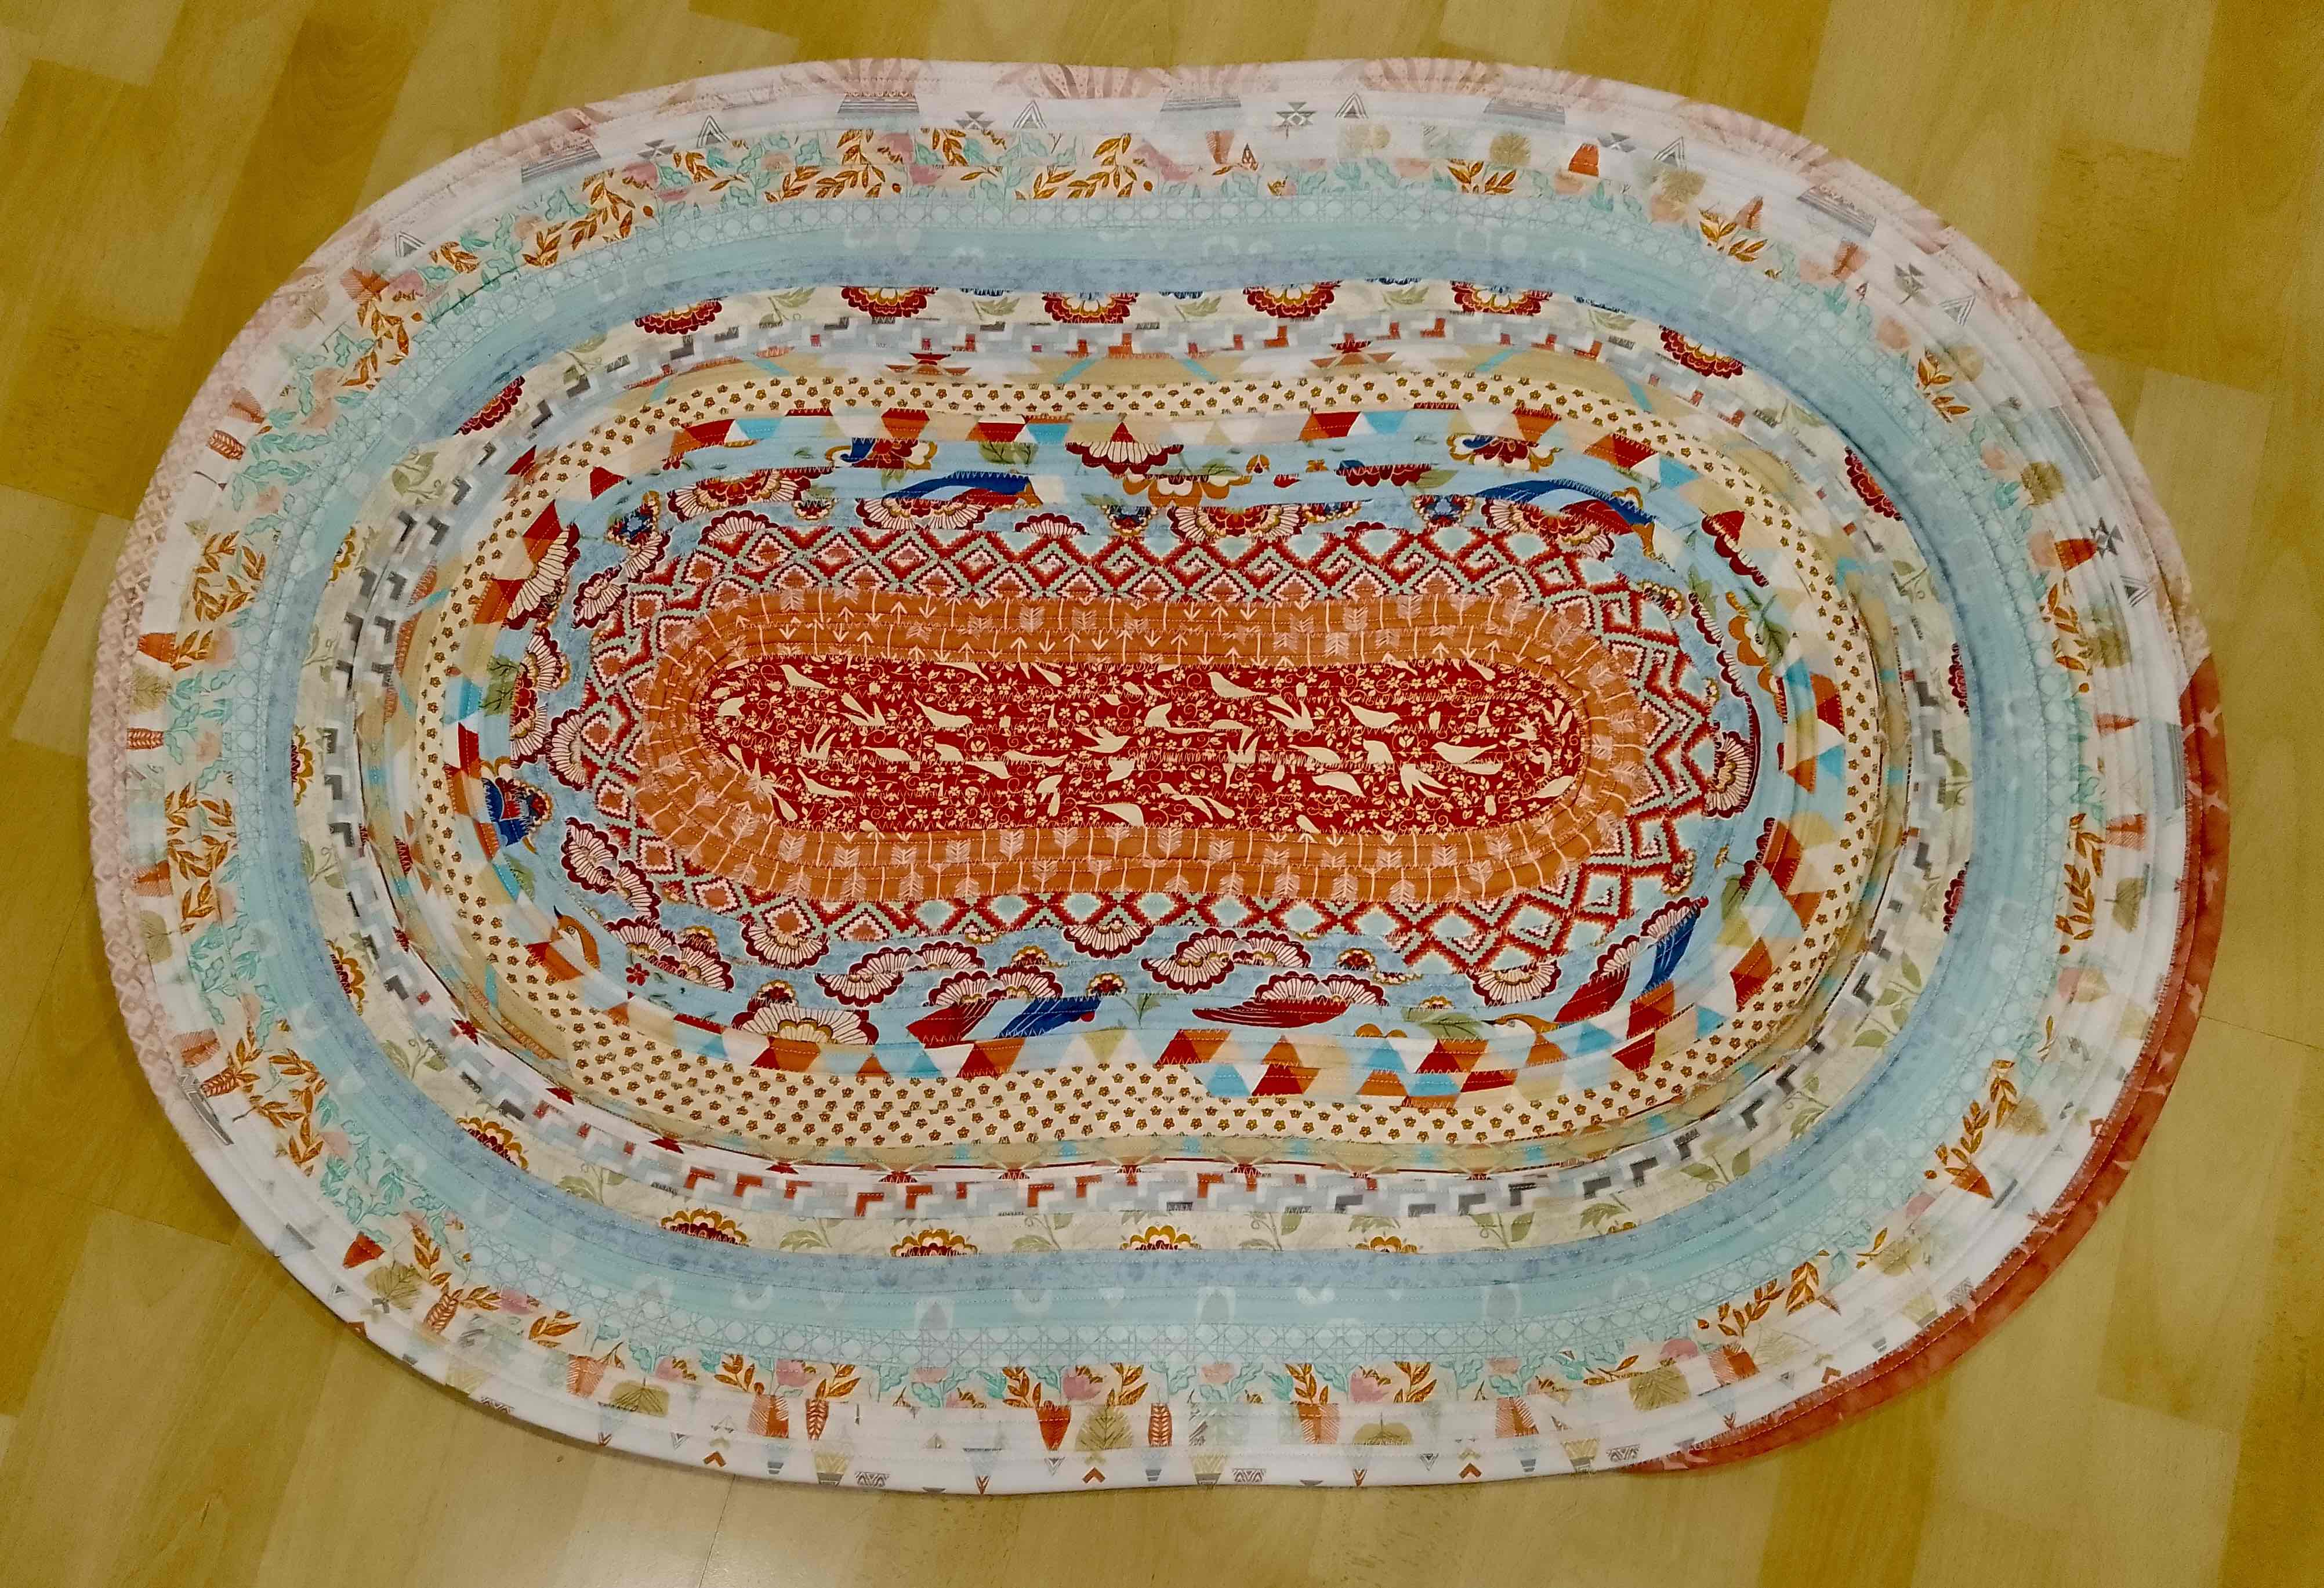
Finished rug
You lay the batting on the wrong side of the jelly roll strip. You fold both edges towards the middle and fold the whole thing in half lengthwise. Pin together. Repeat this for the whole endless length. You taper one end down to half an inch, over a distance of about 6 inches. Stitch the strip down along its length, about ¼ inch from the open edge. You end up with a sort of flat, chubby ‘yarn’. Roll it into a ball, secure with a pin. Start the rug with a straight length (1 used 16 inches) and spiral out, securing with zigzag stitch. You need to ‘feed’ the free yard actively towards the stitching or it’ll get tighter and tighter and end up as a bowl, edges curving upwards. End up with the tapered end tucked neatly under. It’ll need steaming and pressing and possible a night spent under your heaviest books. Total time: 2 days.
This rug is going into the caravan, between the bunks, and will be cosy under foot instead of the vinyl planks.

I love these rugs!
So do I, and now I know how it’s done, I’m sure this won’t be the last one.
🙂
The instructions are a bit inscrutable but the finished article is glorious. I guess the finished rug is about 8 layers of fabric thick underfoot – is that right ?
I’m sure VanEssa will be happy with addition.
It’s from a commercial pattern, and I want to respect the author’s copyright by not giving too much away. The thickness is 4 layers of fabric and 4 layers of batting, so yes, it’s nice and cosy and squishy. I really loved the jelly roll colours (the photo’s not really true to how vivid the colours are), and I can see this rug working in all sorts of combinations.
As soon as I saw the pic I knew where the rug was headed. Isn’t it wonderful that you saved it for now. I must admit surprise to see the word intimidated… you are so good at everything!
It was the sheer task of assembling the rather fiddly ‘yarn’ that put me off. Lazy was perhaps more accurate! In the end it created a ball the size of a basketball. But it is a VERY satisfying little rug, and I’m proud of it.
Your efforts ended up in a very pretty rug!
It is pretty, more so in real life, as it’s gloomy today and the light is bad. Now I know how to do it, I’m pretty sure it won’t be the only one I make.
VanEssa will love it! You are so talented!
When I was in grad school, a friend’s mom tried to teach me how to make a braided “rag rug.” Needless to say, I was not her best pupil. I may have to give it another try.
This is much quicker, although perhaps less ‘authentic’ than a braided one. I think perhaps it also uses less fabric. I enjoyed it – to the point, in fact, that I’ve sorted out a bunch more jelly roll strips!
I think your rug looks fabulous and I love your tips on how to perfect it.
There’s a whole bunch of YouTube videos on how to make this, but to me, the key point was to push through the strip you’re adding to ensure it’s slacker than the strip you’re sewing it to. It’s a fun rug, it’s soft, and it’s not too small to be useful. Larger than a bathmat, for example.
Your rug is very pretty. It think its nicer than the one at the top of the page.
Thank you! I was quite careful in how I arranged the colours, rather than just going with the order they came in.
That decision paid off!
Do you remember me making one of these back in 2021 – it was all going so well until the last few rounds when the dreaded waviness set in. I sorted it out in the end but I was never completely happy with it so, although I have another couple of jelly rolls in the stash, I think I’ll use them for something else. You did a great job with yours, the edges are neat and ‘unwavy’ and the colours really pretty.
I found that if I thought of the strip being sewn on as easing the fullness on a sleeve head into a somewhat smaller armhole, it worked at keeping things flat. On the upside, I can see how easy it would be to make a bowl!
That is a very nice rug but I can see hiw tedious it would be to make!
Honestly, sewing it together was fine, but making the ‘yarn’ was tedious. However, it wasn’t bad enough to stop me contemplating another one from my leftover jelly roll strips. Watch this space…
lovely squishy rug!
Yes! The squishiness is a major part of its charm.
What a gorgeous rug.Does Mouse think it’s his?
Not yet, but it’s only a matter of time, I fear.
So bright and pretty! It will certainly spiff up your caravan.
I do hope so. It’s certainly very comfy under foot, and thankfully is completely washable, so muddy paw-, er, foot-prints will wash out.
That is definitely a bonus!
It’s lovely! I’ve always wanted to make one of these. It gives me a good reason to save my scraps!
You will need a great many of them…
I do love these rugs. I tried a smaller version and made a mat a while ago … mine involved twisting jelly rolls around a piece of cord and stitching them together…. It was a bit ‘fiddly’ & I found untidy harder to control ends, so will try your version soonish (if I get time to breathe!!)
🩶
I’ll bring the pattern with me…
Thank you 😊
Can’t believe I’ll be seeing you in a few weeks 🤩
Not long to go… Just booked the airport parking for while we’re away!
I bought the pattern and some fabric a few years ago and it’s still on my to-do pile, I think I got put off by people saying they had problems making them flat, yours is lovely so I really must try it some time 🙂
Yes, keeping it flat IS a problem. However, I do think I’ve found at least a partial answer in the need to ease the free end of the yarn in by actively pushing it through so it’s under less tension than the edge it’s being stitched to. Worked for me, anyway. I do concede it needs a very heavy steaming and blocking at the end, preferably weighted by some very heavy books for a couple of days. I think the result is worth it.
Really pretty! It will be sparkle on the floor!
More sunshine inside the caravan 😊
Nice rug! I have that on my list to do someday, I bought the special strip batting several years ago to make the rug.
Just a heads-up on the batting: I was warned by the lady who sold me the pattern that the strip batting was the same width as the jelly roll. This made it a bit on the wide side, and folding the strips together was easier if you cut your own to a slightly narrower width. If you’ve already got yours it might be worth checking how wide it is.
Thank you for the heads up! I got it on a great discount sale and perhaps it was “too good to be true”! 🙂
I’m sure you can still use it if you slice a bit off the edges, though. A shame to waste it.
.Well done pulling out your pattern and fabric and getting this done. It will look fab in Vanessa and you have the satisfaction of completing a UFO
It’s only been three years… But yes, it’ll look fab in VanEssa.
It looked Vanessaish from the get go!
Which is funny, because I bought the jelly roll many years before VanEssa was part of our lives. My colour choices may be a tad predictable!